I'm striking while the iron is hot today, quickly following up from my last post with a Battle of 2nd Bull Run (Second Battle of Manassas) update.
The previous update presented a snapshot of how the situation looked at Noon on the 29th of August, 1862. Along the unfinished railway line, Hill's division was doing its utmost to fend off a concerted attack by two Federal corps. Meanwhile, to the southeast, Lee's L-Wing has arrived and deployed along Pageland Lane to await further orders. Further south, a Federal column - Porter's 5th Corps - is winding its way in a north-westerly direction....possibly towards Gainesville.
An hour and a half later, the battle is in high tempo...and so is the carnage. Along Hill's defensive line, the two sides have been slugging it out, inflicting heavy casualties. It's become a brutal and desperate gamble to see who cracks first. A number of brigades have been whittled down to rag-tag shadows of their former glory. Fields' brigade has been destroyed, survivors streaming to the rear.
The butcher's bill is reflected in the toll on senior commanders too. Since noon, AP Hill, Reynolds, Hooker and Reno have all been killed or wounded.
Here is the situation along the northern stretch of the unfinished railroad line, at the commencement of the Confederate 1:30pm turn:
Some of the Union brigades at the southern end of the assault have pulled back after a failed (or one may say successful) stoppage roll. Just to the north, Branch's Rebel brigade is about to collapse, offering the Union a tantalising opportunity to breakthrough...IF they can still bring sufficient force to do so. Aware of this eventuality, Lee had issued Evan's Brigade with a divisional goal to support Hill's (RIP) beleaguered position. Evans' fresh troops may be sorely needed.
To the southwest, things are rapidly hotting up. After a minimum of delay, Lee was fortunate to have his orders quickly accepted by Longstreet. Most of his corps is now pushing eastward, threatening Sigel's already depleted troops with the prospect of a knockout blow. But Lee has worries of his own. Porter's Corps is even now approaching Jones's screening troops deployed around Stuart's Hill. What will be the Federals' next move?
The battle is now at a critical juncture. To find out who will prevail, stay tuned for the next update.
Back in August, I listed my top most highly anticipated games of the day. Now, 4 months later, I am still yet to own a single one of them. What happened you may ask? Well, some of these games have simply not yet been published - and are expected in 2017. However, FAB Golan and Stonewall's Sword have been out for some months now.
What has prevented me from pulling the 'buy' trigger here in Australia is either the games cannot be purchased from any retailer here, or - if they can - the retail price is 150-200% on what gamers in the US enjoy.
Shipping these games internationally has become hideously expensive. Not too long ago, Milsims here in Australia was offering these games at a very attractive price, but the wheels sadly came off of that operation and a number of gamers - including myself - got burnt, with Milsims neither honouring orders nor making refunds. The ratbag running that operation took the money and ran.
I must hasten to add that Milsims has now been resurrected under entirely new ownership. It's too early to tell yet if we gamers will once more enjoy the kind of prices and range of titles of yesteryear. Somehow, I doubt it, as such prices probably contributed to the downfall of a company that had, for so long, been a key part of the gaming retail landscape here in Australia. As a teen in the 70s - when the dinosaurs still walked the Earth - I well remember the excitement of receiving their latest catalogues in the post.
Well, enough of these gripes. At least this new climate of austerity has encouraged me to spend more time with the games that I own - including some that I (ahem) have owned for some time, but never played. More on that in future instalments...as they hit the table. Right now, I am doing a solo learning game from Almeida & Bussaco 1810- one of the many titles from Frederic Bey's Jours de Gloire Series.
This is the game's cover, provided by Christophe Gentil-Perret on the game's BGG page:
I saw this title for sale on E-Bay and decided to pick it up after noting just how highly rated these Bey game are. After playing a couple of solo games, my strong impression is that their reputation is well deserved. These games are generally at battalion-scale - here's a snapshot from that battle - again from the BGG site - provided by Remi Carton:
You can see the fortress of Almeida in the SW corner of the map, bristling with fixed Portugese batteries. For those of you - like me - who are fans of the Richard Sharpe novels from Bernard Cornwell, Almeida should be well known to you....and you can also spy the 95th rifles in the bottom centre of the above image.
I'm not going to go into detail now about this game system, but will reserve that until such time as I have a couple of 2p games under my belt. However, in my solo games, I've been enjoying the chit pull and order allocation system. With the latter, you can see the 'QG' markers with their horseman silhouettes in the above picture. When specific formations are activated by having their command markers drawn from a cup, their associated order (horseman) markers are turned over, to reveal if they have been allocated orders or not. This order status will have implications for a range of actions, including movement and combat. In the picture, you can see a revealed marker immediately to the left of the fortress, indicating that the British formation has not been allocated orders this turn. A player does have the option of trying for a die roll to see if a formation can receive orders. If this fails, then all they can do is rally.
In contrast to the situation in the above picture (Turn 8), in both of my solo games, the British/Portugese were smashed by overwhelming French attacks. I need to think more about how to put up a more effective defence/delay operation.
I look forward to a face to face game of this in the near future.
Enough of Napoleonics. You may be asking what has happened to the epic Battle of Second Bull Run? Well, after a couple of weeks' hiatus while Roger was traveling, the battle has resumed....with fury. More on this soon.
Roger and I have decided to play the entire battle of 2nd Bull Run. We're playing August Fury II, from the Three Battles of Manassas game, which is part of the Civil War Brigade Series (CWBS) from The Gamers.
It's NOON on the 2nd day of the battle. Here is the situation (Each number corresponds to a number on the map):
1. About mid-morning, Lee and Longstreet arrived with the entire L Wing, intent on joining up with Jackson and his beleaguered J Wing. By noon, they have deployed along Pageland Lane. They await further orders from Lee.
East of their position, Franz Sigel's 1Va Corps has gone on the defensive, after pulling back from an earlier attack that had bent back Jackson's right flank and forced Stuart into an emergency retreat.
Jackon's boys on his right are grateful for the rest. Prior to Sigel's attack, they had been on the attack themselves late on the previous day, near Brawner's Farm - forcing back Hatch's 3Va to south of the Turnpike. Badly cut up, the 3rd Va was withdrawn during the night.
Here's a close up of the situation at '1':
2: Earlier in the day, the pressure had been on Jackson's right wing, but now the left under Hill is on the receiving end, with the successful arrival and activation of the Union 3rd Va, 3rd and 9th Corps. Pope is also on the field (Playing the Union, Roger opted to use the optional rule increasing Pope's command rating from 0 to 1).
Both sides have been dishing out hell now for a couple of hours. The Rebel position along the unfinished railroad is hard pressed, but holding so far, despite the destruction of Field's Brigade. The Confederates have seen off Reynold's bruised 3rd Va - Reynolds himself wounded and Seymour's brigade has routed. The Union has just renewed the attack, with troops under the command of Kearny, Stevens, and Hooker - whose brigade under Grover has been whipped up by Rebel fire into bloodlust (BL).
Here's a close-up of the situation at '2':
As the fighting intensifies, to the south, another Union formation arrives: Porter's 5th Corps!
Rebel scouts report that it is marching north-west along the Manassas-Gainsville Road.
An update will follow as our own rendition of this epic battle plays out........
This month I had the pleasure of purchasing and reading The Cold War by a man who has been called the 'dean of Cold War historians', John Lewis Gaddis.
I have the paperback - cheap as - version that comes in at only 266 pages. Associated with that is the only gripe I have with the book - the font size is small enough to be a tad annoying.
If, like me, you are a fan of Twilight Struggle - and are looking for an insightful single volume overview of the Cold War as a kind of companion to the game - then I can highly recommend this title. What this book is not, is a comprehensive A-Z guide to all of the events cited in the game. Rather, the author elegantly steps through the various stages of the Cold War in chronological fashion, ably providing expert analysis and evaluation of key events, personalities and themes that came to define the fascinating course of the Cold War. It's not a dry read either.....Gaddis writes with aplomb, wit and penetrating insight...all contributing to an enjoyable read.
Two fans of Twilight Struggle ham it up to celebrate their 100th game!
(Photo by Fred Shugars)
Reading The Cold War made it clear to me that while Twilight Struggle may be a great duelling-style game, it's also incredibly simplistic in its rendition of the conflict and cannot possibly capture many of the significant philosophies, personalities and the ebb and flow of social and economic currents that played a crucial role in how the history played out. China and Mao for example are such huge players in Cold War history, but are only given tangential treatment in the game. And what about concepts such as Mutually Assured Destruction that are just so central and unique to the story of the Cold War?
Perhaps future games on this subject will seek to build a more nuanced portrait of this long and titanic struggle. I look forward to that. In the meantime, I'll continue to enjoy playing Twilight Struggle!
As it turns out, rather than a 'Part Two' report of this scenario, it's more appropriate to term it a 'postscript'. In our version of history, Longstreet proved to be far less reluctant to take the fight to the enemy, sweeping eastward - eventually with most of his corps - to engage Brig. Gen. John Reynold's depleted division of Pennsylvania reserves at New Market.
By 14:30, Reynold's division had been almost totally wiped out - with only the last remaining batteries of divisional artillery escaping capture. Reynolds himself fell into Rebel hands.....sparing him from his fateful meeting with destiny at Gettysburg! A Union relief column from the south - under Hatch - could not arrive in time to prevent the rebels from capturing New Market.
This is how it looked:
Immediately to the north, Jackson's divisions (Ewell, Taliaferro) pushed eastward, forcing back Franz Segel's beleagured 1st Va Corps. The force of the Rebel attack routed 2 brigades and their supporting artillery, panicked Federal troops swarming over their supply train as they fled. By 2:30, the Confederates had seized Chinn Ridge, before their orders directed them to advance towards New Market.
Further north, Pope attempted to break through the line of A.P. Hill's defenders still manning the unfinished railroad. Unaware of the situation elsewhere, he still thinks he's on the verge of a major victory and pursuing a defeated enemy! Kearney's division and Reno's 9 Corps advanced to try and force their way through near Sudley Church, but dug in, the Rebels proved a nut too tough to crack, driving off the blueshirts and wounding divisional commander Isaac Stevens in the process.
The situation at 14:30:
With the Union army scattered across the battlefield, unable to contend with the rapidly evolving situation, we elected to discontinue the game.
The post mortem on this scenario is that the Union seems doomed for defeat thanks to the initial orders issued by Pope. These orders largely consign various Union formations to piece-meal, un-coordinated attacks - often against Rebel defenders holding superior ground - that rob the Union of any real chance to deliver a telling blow.
As mentioned, Pope's 0 leadership rating - and delay in arriving on the scene - makes it very difficult for the Union player to successfully change the above situation to avoid disaster. Much also rests on how quickly the two sides can bring in their reinforcements. We opted for the variable arrival rules, requiring a 10+ to be rolled for each formation. Unfortunately, the dice did not go in the Union's favour. In contrast, the Confederates were able to bring up Longstreet's corps pretty much on schedule. With Lee and Jackson's high command values, the Confederates proved much more effective at responding to the battlefield situation and seizing opportunities.
We certainly enjoyed playing this, especially given the uncertainty surrounding the arrival of formations and the potential that exists for manoeuvre.
Coming out of this, Roger and I have decided to try our hand at the full battle of 2nd Bull Run! The hope is that the much longer time-frame will allow the Union commander more opportunity to formulate and prosecute a cohesive offensive against those vile Rebels!
Hot on the heels of our completion of a 1st Bull Run scenario from Three Battles of Manassas (MMP/The Gamers), gaming buddy Roger and I elected to graduate to a larger scale battle, allowing us to make full use of the Civil War Brigade series command rules. Logically enough, the choice was a scenario from August Fury II, covering the 2nd Battle of Bull Run: 6.2 The Second Day.
We opted to increase the uncertainty by adopting the variable arrival rule for reinforcements - requiring 10+ to be rolled before each due formation can enter the fray.
Here is a Vassal snapshot of the field of battle and objectives at 5am on the 29th of August, 1862:
Thanks to Pope thinking that Jackson is retreating westward, Union troops face a tough job in what amounts to hurried and piecemeal assaults against a Confederate corps holding strong defensive ground. Not only that, but one expecting reinforcements to soon come a marching down the Warrenton Turnpike.
As the initial orders for the Union corps have already been accepted, the Union player has little choice but to follow through in the hope that the rebel line can be penetrated. Attempts could be made to exercise divisional command initiative, but the odds are not good and there is an element of risk (rolling snake eyes activates the 'loose cannon' rule, allowing the opponent to control said division for one turn!).
The Union troops advance and carry out their assault.
7:00 am
Here is the situation two hours later:
On the Union left, the Rebels are pouring fire into Reynold's division...so much so, that they are already running low on ammo! But they are getting results and Reynolds' boys are crumpling under the withering fire...but not before Union artillery deal out some harsh treatment to Johnson's extended line (in the current turn, he will become disorganised).
Meanwhile, Sigel's corps has elected to ram into the centre of Jackson's line, hoping that a solid push on a narrow front will get results. The Rebs are dishing it out and Schimmelfennig's men have pulled back, disorganised. Yet, the Union are scoring hits too, with Trimble and Archer's veterans bearing the brunt.
The Union desperately needs its awaited reinforcements to arrive - now! But instead of Pope and two welcome corps, all that has shown up so far is Kearny and his three brigades, now advancing to join in the attack.
And Jackson is still alone...no sign of Lee and Longstreet.
9:00 am
Two hours later, little has changed. Kearny's brigades have badly bruised themselves attempting to push back A.P Hill's brigades defending south of Bull Run. Reynolds succeeds in cancelling the attack and has pulled back to Groveton to lick his wounds. In the centre, Union troops have sent Trimble packing, forcing him to abandon the railroad line....but Early and Gregg promptly fill the gap, robbing the Federals from securing their hard-won gain.
And off to the West, there are signs of an approaching column, while still no relief in the East for the Union.
11:00 am
By 11am, Lee and part of Longstreet's L-Wing has appeared on the scene and deployed on the Confederate right flank, forming a hinge. Un-nerved by the slaughter, Sigel has called off the attack (via a stoppage roll) and pulled back in front of Chinn's Ridge, east of Groveton.
Finally there is significant Union activity in the South, as Porter's 5th corps advances NW up the Manassas-Gainsville Rd. It has orders to occupy Gainsville to hold any rebel advance from the west. But the cat is already out of the bag!
13:00 hrs:
By early afternoon, Porter's corps has taken up position at Gainesville, waiting for rebels that have already passed them by. In fact, Longstreet's entire corps is now on the battlefield - half moving to a rendezvous with the Federals at New Market, while the rest are blocking the Manassas-Gainsville Rd.
As both Lee and Pope are on the map, each can issue orders to their commanders as soon as their HQ's take up a position. Just west of Groveton wood, two of Jackson's blooded divisions have received orders (Jackson initiative) to push Union troops off Chinn Ridge and move on New Market. It looks like a pincer movement....Civil War style.
Pope has appeared east of Hill's position....but it's too little, too late.
My next instalment will reveal how the rest of the battle plays out. So far, the result seems to generally reflect that of history: piece-meal attacks robbing the Union of the cohesiveness it needs to overwhelm the rebels, in tandem with an inability to swiftly adapt to the rapidly changing situation. The rebels get a jump on them, sweeping eastward in superior numbers. Jackson's high initiative value plays a telling role here, as does Lee's overall command superiority ('4' to Pope's '0'). Porter sitting there out west at Gainesville, doing nothing.....seething at the idea of taking orders from boastful Pope! In the end, it cost Porter his command...and career: court-martialed and cashiered from service.
Here are 5 games that I am looking forward to playing - hopefully within the next 12-18 months. Few of these are yet available - some are still sitting on GMT's P500 list, or equivalent.
1. FAB: Golan '73 (GMT)
After having gushed about FAB: Bulge being one of my top 5 games, it's little wonder that the latest FAB release from designer Rick Young has been on my radar for some time. I don't have a single Arab-Israeli War game in my collection, so this is the perfect opportunity to address that gap as well.
I'm hoping that this title will mark a return to the the ability of players to stage breakthroughs in the enemy line and exploit them using armour and motorised units. This feature of the FAB system shone in Bulge.
Check out the map:
FAB: Golan '73 is currently shipping.
2. The Dark Sands (GMT)
This one still resides in the GMT P500 list and is slated for release in the first quarter of 2017. A big North Africa title is another gap in my collection and it is a conflict/theatre that has always appealed to me. It's a very different design approach from Raicer's Paths of Glory - it's not a CDG - but I think anything from Ted deserves close scrutiny. The sister game already in print - Dark Valley - covering the Eastern Front, was well received.
3. Wild Blue Yonder (GMT)
The Down in Flames series was pretty popular back in the 90s, spawning quite a few expansions. Somehow, that phenomenon passed me by (I had a long hiatus from board wargaming during the period). I'm now keen to make amends and welcome the return of this classic WWII tactical series, now given the deluxe treatment. Disappointingly, the title has been on the lists for some time, and is currently not slated for release until the second quarter of 2017. The slow pace in attracting support for it certainly surprises me. I look forward to playing the campaign games and hope that a 3-4 player variant will also be in the offing, allowing for some monster dogfights.
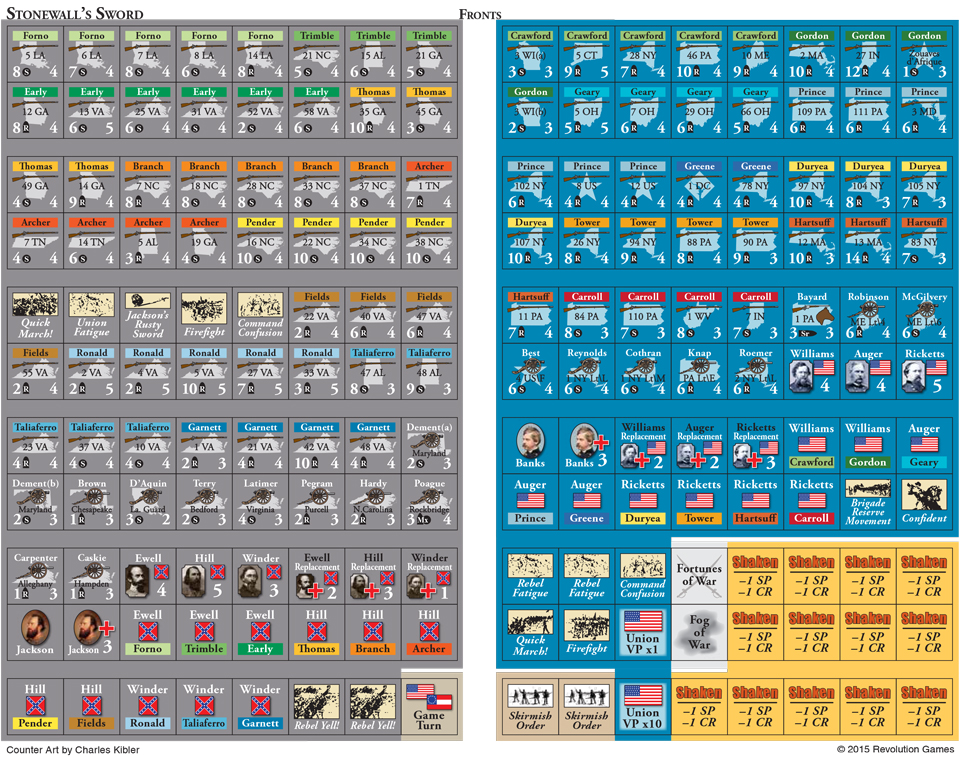
4. Stonewall's Sword (Revolution Games)
This title caught my attention earlier this year as it combines a tactical, regiment-level simulation of the battle of Cedar Mountain, with an interesting chit pull system. I subsequently downloaded the ruleset and Vassal module to give the game a solo spin. What resulted was one of the most enjoyable gaming experiences I've had in some time, even when playing solo. The uncertainty surrounding drawing chits - some of which assist you and some of which can hamper your opponent - makes for a lot of fun. You can also formulate strategy as to when you wish to play some of the event-based chits, for maximum effect.
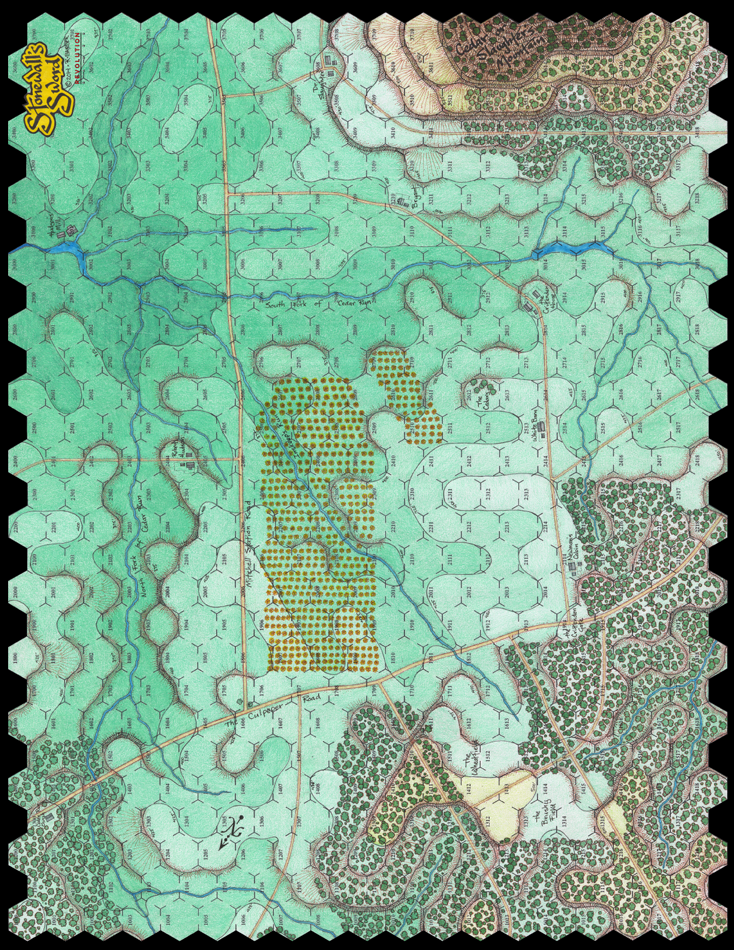
The counters are very attractive:
...as is the map, though it can be frustrating at times trying to work out the height difference between hexes (someone handily superimposed quick reference numerical height levels onto the map, available as a download from the BGG Stonewall's Sword site). In the image above, in addition to various units and commanders (who are activated by chit pulls), you can see some of the event chits (such as Command Confusion, which can be played on your opponent at an opportune moment in play).
Not surprisingly, I hope to acquire this title in the near future. The designer is Hermann Luttmann, which is a good sign that this is a quality ACW title. I also own his little solo game, In Magnificent Style, which is excellent. Support for the system in this game is gathering steam, with a further title - Thunder in the Ozarks (Pea Ridge) - in the works from Revolution Games, and one coming out from GMT, called Hammerin' Sickles (Longstreet's attack at Gettysburg).
5. Hitler's Reich (GMT)
Another title on the P500 list, currently yet to make the cut. I wouldn't be surprised though if this title is fast-tracked. It offers a fast-paced and fun card-and-map game for two or more players, that can conceivably be played within a couple of hours. All of this should be tonic to gamers - like me - in a mood for something lighter in style and approach. Mark McLaughlin is one of the designers too, so Napoleonic Wars fans, take note!
The GMT blog devotes some attention to this title and the cards look great. Here's a sample:
I sooooo much want to become a fan boy for one of the hottest game systems to emerge in the wargaming hobby in recent years: COIN. Short for 'counterinsurgency', in which - generally - each player controls one of 4 factions vying for dominance in a historical conflict, COIN has quickly morphed from dealing with recent conflicts in Colombia and Afghanistan, to the American War of Revolution and even - now - back to Caesar's Gallic Wars.
A fan of CDGs (card driven games), I was quickly attracted to the COIN system. To date, I have played Cuba Libre half a dozen times and Liberty or Death (which students of history unfamiliar with the game would quickly link to the American War of Independence) three or four times.
I have to say that I enjoyed my first games of Cuba Libre. Roger of the famous Roger's Reviews Geeklist on BGG handily summed this game up as being like a 'knife fight in a phone booth". From my experience, that's a very apt description. You're often into the action very quickly, with 4 factions duking it out for dominance on the non-too-roomy island of Cuba. The game narrative is dynamic and spirited, with a single card play capable of creating quite an upset to what had been the status quo in cosy Havana for instance.
But the Cuban magic started to wear off after I played a couple of games in which I controlled the Directorio (yellow markers) guerrilla faction. No matter how much I wanted to exercise the full palette of commands and special actions available to me, I could never quite seem to do so. Instead, I often found myself doing the same, repetitive command combination. Then I heard one of the other players express a similar sentiment about his own faction.
Yet, undeterred by this, I persisted with COIN and soon fastened my attention on Liberty or Death. Being a huge fan of Washington's War and the historical period and theatre in general, I went to quite some lengths to get hold of a copy before they sold out (ably assisted by the terrific staff at GMT in the US, I must say - a quality team). Besides, it's such a gorgeously handsome game, with first class components. Here's a taste:
Upon receiving my copy, I sooooo wanted - now - to be a fan boy of Liberty or Death. But, several games later, instead I've become a 'Doubting Thomas'. Maybe even a Benedict Arnold. Let me hasten to add that it's not that I have been punished by the game, to trail the field at the finish. Quite the contrary...in most of the games, I have come close to winning. It's more about the game experience that has left me a little cold. Let me explain. First and foremost, it is the sheer down time of waiting for your turn to come around again. This is of course an issue with many 4p games in which player interaction can be minimal. But in COIN, this feeling is intensified by the fact that there is often little to be done when your turn does come up. For a start, depending on the eligibility table on the game map, you may either choose the event on the card, or exercise a particular combination of command and (possibly) a special ability. That may seem fine, but some of the commands are specific to a particular situation in the game, so can often be ruled out. At least in my experience, what normally results then is that you either go for the event or enact the usual command that you have become accustomed to. Mustering with the British. Rallying with the Patriots.
Whatever you choose, the sum total is that you often find yourself doing a few small actions on the board, before handing the baton (figuratively speaking) to the next player....before resuming your snooze. This is particularly the case if all you have at your disposal is a limited command, restricted to a single area.
Gaming buddy Steve shares my views on COIN. He points out that one of the pleasures of CDG games is that you receive a hand of cards, which then allows you to plan your intended strategy for the turn, taking advantage perhaps of the combination of events and 'op points' on offer. The intrigue is seeing if the strategy can be implemented....largely depending on whether it survives 'contact with the enemy'. This approach to gaming supports conceiving an overall plan....strategic goal setting. By permitting you to only respond to a single card, COIN is a much different ball game....you never know what your next option is likely to be. It's piece-meal.
This probably sounds overly critical, but my experience of COIN thus far often leaves me somewhat frustrated and feeling like a kind of machine attendant, in which the machine is the game system. A gaming buddy of mine who now avoids COIN games, quipped that you don't play the game, it plays you. I can't help but feel that there is more than a grain of truth in this.
Of course, COIN now has a legion of fans....so it has to be doing a lot right, doesn't it? Are they deluded, or am I just a lonely voice, signifying little? Certainly, I would love to hear the views of other gamers. Perhaps my viewpoint can be rehabilitated. That would be nice, especially as Liberty or Death now takes up considerable space in my game collection. Sometime, someday, it WILL return to the table. For deep down - in the guerilla-infested forest of my mind - I still want to love COIN games.
Roll on with another Napoleonic title! This game report has been reproduced from the BGG original by the kind permission of its author and local gaming buddy, Steve. Steve has a voluminous game collection to say the least, but if one can detect any salient themes, an abiding interest in Napoleonic gaming would be one of them.
Take it away, Marechal!
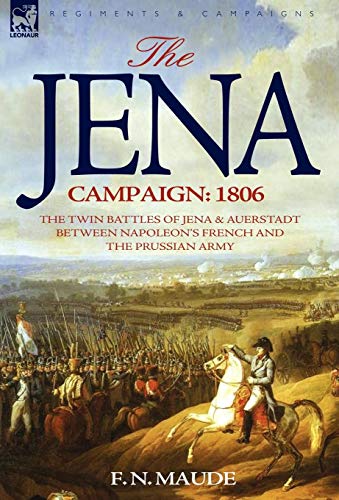
Game review: Jena: Napoleon Conquers Prussia - October 9-16, 1806.
Publisher: Clash of Arms games, 1996
Designer: Ed Wimble
Having been prompted by a recent discussion on Napoleonic tactical/operational game systems to revisit this game, I was astounded to discover that there were no reviews on BGG…this is my attempt to remedy this sad state of affairs.
Designer Ed Wimble is better known as the main man behind ‘Clash of Arms games’ and also as something of a Napoleonic expert for his work on the 'La Battaile' series of game, probably the most detailed tactical level games on the era. Fortunately in this game the designer has taken a broader view and designed a game on the campaign itself.
As Ed writes in the designer notes, ‘Prior to making a study of Napoleon’s 1806 campaign, most of what I knew about it was from general histories. Because of this I was very reluctant to develop a game on the subject. It seemed too one-sided. I asked myself, “Who would ever want to play the Prussians…?”’
Fortunately for those with a desire to refight the campaign, the designer’s interest was piqued by a visit to the region and a shift in focus from the disastrous (for the Prussians) battles of Jena-Auerstadt to the manoeuvring that led to the battles. The game focus is therefore very firmly on the opening weeks moves of both sides, which in effect was the Napoleonic version of ‘Blitzkrieg’. Essentially the much vaunted Prussian Army, still resting on Fredrickian concepts of warfare was shattered in a week of combat and totally demoralised after a lighting six week pursuit by a French army at the top of it’s game.
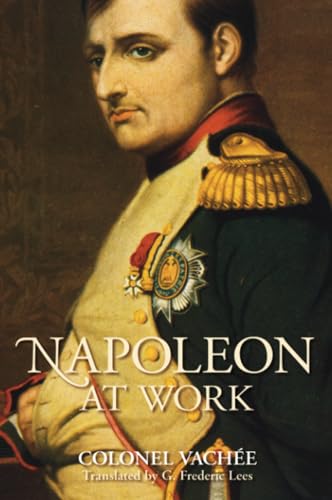
The game is therefore clearly focussed on the operational aspects of moving Corps and divisions to bring the most effort to bear when a battle is joined. The game system is based on Ed’s earlier offering L'Armée du Nord, and is ideally suited to the portrayal of key events without getting bogged down in detail. The game forces the player to act like an overall army commander and for those that have read the classic books on the campaign, such as F.L Petre’s ‘ Napoleon’s Conquest of Prussia’ or Colonel Vachee’s “Napoleon at work’, it really helps bring the dilemmas faced by both sides into view.
Components
Jena! Is an impressive looking game and if ever a game was sold by its cover, then this is it. A dramatic painting by Edouard Detaille of the French 4th Dragoons making off with Prussian trophy graces the box top. Three full 34” x 22” game maps provide the next hook. Beautifully rendered in autumn tones by Rick Barber they portray the campaign area in an almost contemporary way. Roads are lined with rows of trees, villages and towns dot the landscape and slopes and hills are rendered functionally. To add period feel, the terrain features and locations are rendered in Teutonic script. You almost feel like a commander poring over a map from the era. Map scale is roughly 1km per hex.
This photo by Mark Mokszycki shows a portion of the south map. It's one of three such maps, so don't attempt without a large table!
The full campaign does take a lengthy table area, but the good news is that there are numerous one-map scenarios to provide a taste of the system and replay key moments of the campaign.
420 counters, comprising mostly combat units are nicely functional with uniform colours forming the basis of the design and back printed with the national flag for each side. Information is kept to a minimum with strength points (each representing 1000 infantry, 500 cavalry or an artillery battery), morale ratings from 1-6 and movement ratings.
The rulebook is a concise 16 pages, which also includes 3 pages of scenarios and setups, so the core rule systems are essentially 12 pages in total, making it an easy game to learn and start playing.
The package is rounded out with an Off board movement track, which is used by the Prussians to bring units on to he main map and several cardstock play aids contain turn tracks, combat results table, bombardment effects and terrain effects chart.
The size of the map ensures that there is relatively little crowding and gives the Prussian player plenty of scope to trade countryside in the face of the French onslaught until they can determine where the main thrust will be delivered. There are plenty of rivers and high ground to ensure that the Prussian can choose good defensive terrain to balance out some of their tactical deficiencies when the battle is joined.
Game play
Whilst it has been over ten years since I actively played this game, I still have vivid memories of a number of campaigns that were played out and hung in he balance at times until the very end game. Whilst things do appear grim for the Prussian player, his war-game counterpart is not bound by the same errors and muddled thinking that plagued the Prussians in reality. The game system gives the French player better command control to manoeuvre units, but the back printed counters are utilised to provide limited intelligence so that each player is never quite sure which commander and force he is up against until the battle is joined.
Combat does have tactical nuances with rules for cavalry charges and bombardment to provide the feel of Napoleonic warfare. Morale is also a major aspect of the system and often you will see your troops melt away in defeat, but prudent use of terrain for the Prussians enables them to rally units back to he colours and fight another day and for the French it is a race against time to capture a much ground as possible, to ensure that shattered Prussian units stay in the dead pile.
Overall I cannot recommend this game highly enough. Some errata is needed to resolve minor issues, but not to the extent of detracting from the game. In revisiting my copy I found numerous patient replies to my written enquiries from the designer. None of the errata I requested was overly detrimental to play of the game at the time. If you can find a copy and you are interested in the era then don’t hesitate to buy!
In terms of book companions to the battle and the period, Steve recommends the following titles:
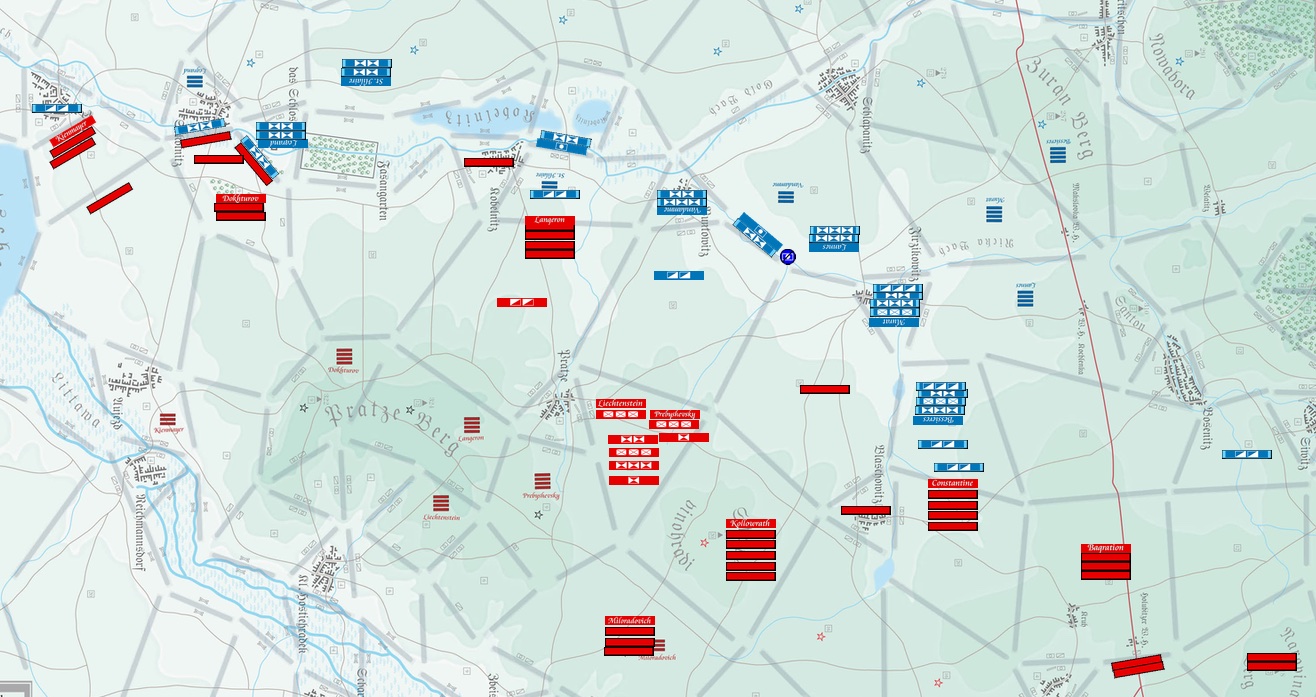
This game report has been reproduced from the original by the kind permission of its author - and local gaming buddy - Roger. In this game, Roger played the French, while I commanded the combined Russian - Austrian army. Napoleon's Triumph is an innovative block-and-area-movement game, based on the battle of Austerlitz in December, 1805. Thanks to photographer Paul Humphreys, this is how the game looks, in all of its component glory:
Each rod represents a specific infantry, cavalry or artillery formation. The historical commanders - such as Bernadotte in this photo - are also represented. The number of icons on each block denotes unit strength. Roger owns this game and we played a couple of face-to-face games, before progressing to games over Vassal. Based on this 4th game, I present Roger's report (with some annotations from me, in brackets). As the battle progresses, he cleverly weaves in maxims from Napoleon.
'Gentlemen, examine this ground carefully, it is going to be a battlefield.'
2nd December 1805
7AM
The French make the mistake of splitting the Guards. Cavalry screen the vulnerable French corps. The Allies outnumber them 2:1.
(Click on images to see higher res versions that show more detail. In later images, red and blue dots show you where the action is)
8AM
The Austrians confidently advance. St Hilaire feigns a retreat from Langeron. Bagration sets a roadblock on the main road.
9AM
The Austrian columns continue their general advance in the centre. Vandamme is damned for making a rash attack on Prebyshevsky and loses a regiment.
'Artillery is more essential to cavalry than to infantry, because cavalry has no fire for its defense, but depends on the sabre.'
After the artillery softens the opposition, Lannes orders a heavy cavalry charge...
10AM
The cream of the Allied army is soon in disarray.
'It is the business of cavalry to follow up the victory, and to prevent the beaten army from rallying.'
How did this happen? Roger explains:
At the start of the turn, an Austrian 3-str INF and 1 ART were defending the approach (grey border zone separating areas) opposite a French 2-str INF and 1 ART also in the approach, facing off as it were. The French heavy cavalry were waiting in reserve. The Austrian columns were in reserve and in 'column' - ie not in a defensive formation.
The French start with an artillery attack which can only be absorbed by the Austrians in the defense approach. This reduces the Austrians to a 1-str INF and 1 ART or 2-str INF no ART. The French 3-str CAV then mounts an attack into the weakened defence approach. The Austrians must defend from the units in the approach, and put up at most a 2-str defence. They lose the fight and must retreat. The Fr heavy CAV then advances into the locale.
As the Austrian columns in the reserve locale were not expecting an attack, they become dismayed by the routed units from the overwhelmed defence approach, and they too rout.
Essentially the units in the reserve locale can be thought as being in 'column' formation, surprised by an unexpected attack and panic, particularly as they see the defenders streaming to the rear.
(My guys in the centre lost cohesion as a result of coming out second best against the French cavalry. This detaches each one of them from their corps - not good, to say the least).
11AM
Bernadotte's sudden appearance on Kienmayer's flank causes a rout. Davout is punctual.
'A general-in-chief should ask himself several times in the day, 'What if the enemy were to appear now in my front, or on my right, or my left?''
The Allied right is now under serious pressure.
'The transition from the defensive to the offensive is one of the most delicate operations in war.'
French morale 18; Allied morale 14
1130AM
Constantine orders a fierce barrage.
'The worse the troops the greater the need of artillery.'
12PM
Murat continues to order probing attacks, while Davout attempts to outflank the Allied position.
On the French left, Bernadotte waits for Legrand to catch up. The plan is to exploit the Allies' limited commands by putting pressure everywhere.
'I have destroyed the enemy merely by marches.'
1PM
Kollowrath reinforces the Allied pocket. Davout gambles on an attack but Kollowrath's counterattack throws him back.
'We should always go before our enemies with confidence, otherwise our apparent uneasiness inspires them with greater boldness.'
Bessieres gets tired of carousing in town and moves off with heavy cavalry to bring pressure to bear on the Allies elsewhere.
1:30PM
Kollowrath pursues Davout. Prebyshevsky and Liechtenstein continue to bring reinforcements for a counterattack.
Miloradovich moves to counter Bernadotte.
2PM
Murat orders a cavalry charge and routs the Allies. Further successful cavalry attacks in the centre and on the French left complete Allied demoralization for a decisive victory!
'Charges of cavalry are equally useful at the beginning, the middle and the end of a battle. They should be made always, if possible, on the flanks of the infantry, especially when the latter is engaged in front.'
Some rules nuances contributed to the Allied defeat in relation to cavalry penalties/obstructions and being aware of the ability to attack twice through an approach in certain circumstances. Still, great tense fun.
'Remember , gentlemen, what a Roman emperor said: The corpse of an enemy always smells sweet.'
--00--
So, I had my head handed to me in that one :-)
Thanks again Roger, for allowing me to reproduce your report. Turning to the subject of books, while I have not yet managed to acquire a copy or read it, David Chandler's massive 1200 page plus 'The Campaigns of Napoleon':
....is often cited as THE single source book for the serious Napoleonic reader. Be prepared to part with quite a lot of cash for this one. It's well overdue to be reprinted!
For my own part, I have read several books on aspects of Napoleon's military career. For those looking for a handy single volume overview - and one written in a very engaging style, with generous illustrations and maps - I can recommend 'The Napoleonic Wars' by Gunther Rothenberg:
This is from the same 'Cassell's History of Warfare' series that I recommended in my earlier entry about the classic WWI game, 'Paths of Glory'.
In June and July, local gaming buddy Roger and I decided to get acquainted with the Civil War Brigades series of games from The Gamers/MMP, by starting - logically enough - with the battle of First Bull Run. The battle is otherwise known as First Manassas.
To ably set the scene, I recommend a spot of period music. This is Richmond is a Hard Road to Travel - set to photographs and performed by the brilliant Bobby Horton:
We played scenario 6.3: First Battle of Bull Run, from the excellent Three Battles of Manassas game.
I played the Union, while Roger took the Confederates.
This map, taken from our Vassal game, shows the situation north and south of Bull Run at nine in the morning of July 21st, 1861:
Commanding the Union, General McDowell had initially sought to turn the Confederate right flank, but discovering it to be heavily defended, he then personally travelled westward (the Union had no cavalry to speak of) to seek an opportunity on the Confederate left. This delayed an already postponed attack, allowing further rebel brigades to arrive. In fact, Beauregard had intended to launch his own surprise attack, further downstream, on the morning of the 21st.
Finding the Sudley Springs Ford unguarded, McDowell hatched a plan to send two Divisions across the Ford and down the Manassas-Sudley Road, while Tyler's 1st Division created a diversionary 'demonstration' near Stone Bridge.
So, as the scenario opens, having already received their orders, my Union troops are beginning to cross Bull Run at Sudley, while Roger is sending Evans and a handful of other CSA Brigades towards Mathews Hill and Dogan's Ridge, north-west of Henry House Hill.
In this game, each turn represents half an hour. Fast-forwarding the game, here is the situation north-west of Henry House Hill, at 10:30am:
The rebels are preparing a reception committee for the advancing US troops, with Bee and Bartow extending their line. 'Shanks' Evans traded fire earlier with the Union vanguard and has staged an emergency retreat, his men already complaining that ammo is running short.
The fighting intensifies as the Federals push on Henry House Hill. This is the situation as the Union prepares to move, an hour later - 11:30am:
Bolstered by artillery, Evans has taken up a defensive position on Henry House Hill. Wade Hampton's finely uniformed 'Legion' (one of the South's richest men, Hampton financed and equipped his own brigade) has arrived and taken up position alongside Evans. Stuart's cavalry (which can act independently, requiring no orders from senior command) guards the road east of the Hill, in case the Union First Division makes a move to cross Stone Bridge.
Bee's boys have just taken a full Union volley and routed down the Sudley Road, before gaining some cohesion (now marked 'DG' - disorganised). Beauregard has arrived too. His presence means that orders can quickly be relayed to troops in his vicinity. But whether they'll be promptly obeyed....or obeyed at all, is up to the dice gods.
During this turn, Hunter's Division continues to cross Young's Branch, and Heintzelman's 3rd Division marches along Sudley Road, soon to add to the push for Henry House Hill.
Meanwhile, over on the Union left, I tried to kick Miles' Division into action by rolling for his initiative. Not an easy thing to do as Miles is rated '0' for command, meaning that only a 12 on two dice would succeed. Well, I succeeded alright.....for the rebels that is, rolling a double one! This delivered a 'loose cannon' result, meaning that instead of me, Roger could order Miles! He promptly sent Miles' division on a merry goose chase into the forest due east of his position. Such an order applies for one turn. Looking up the history, I was amused to discover that Miles had been reprimanded for being under the influence of liquor at Bull Run....so this was a great example of game-play mirroring history!
At midday, the battle reaches a new level of ferocity as Union troops storm Henry House Hill, in an attempt to dislodge the Rebs and seize the position before Confederate reinforcements - including Jackson - can arrive. Brigades under Porter and Burnside are locked in close combat with the hard-pressed Rebs under Evans and Hampton. Here is the result, after resolving close combat and completing the Union move:
With the support of his artillery detachment, Evans succeeds in repelling the Union assault. Shaken, Porter's boys retreat one hex. Further along the ridge, it's a better story for the Union. Ramming into Hampton's thin ranks, Burnside's shaken brigade dislodges the Rebels from the crest of the Hill.
For those of you unacquainted with this game system, you may be puzzled by the absence of 'attack' and 'defence' strength values on the counters. One of the cool aspects of Civil War Brigades is that the fire strength and losses taken by brigades is kept secret, with each player keeping records of strengths, casualties and stragglers on their respective Loss Charts.
Back to the battle. The Rebels are now in a precarious position on the Hill....and throw everything they have into a defensive volley.
Pow: Rebel defenders overlooking the Manassas-Sudley Road lay down a scathing fire, sending Porter's extended line reeling back, disorganised, with some troops fleeing the field. In game terms, I rolled a 62 and 56 for each unit respectively. The first number counts as '10s' - and the higher the number, the worse the result for the defender. Ouch.
Pow: Hampton's ragged ranks only manage a morale check on Burnside's victorious brigade on the crest of Henry House Hill. I'm relieved, then roll for morale. It's a:
66!
That's the worst result possible and Burnside's boys erupt in panic and rout!! Victory is cruelly snatched from their grasp and it's an ugly spectacle for the civilians who have travelled from Washington to view the battle. I guess Burnside's boys must have looked sideways and seen Porter's troops skedaddle....and thought it was a damned good idea!
Due to the rout, Burnside can no longer maintain an extended line, so the brigade collapses and runs for the rear, failing a rally roll to send them streaming northward. Little do they know that Stuart's cavalry is waiting for just such an opportunity.
Within the next hour, Burnside's brigade will be completely eliminated, mown down by cavalry volleys in their flank and rear.
While this is happening, I got lucky with McDowell's orders to Tyler's 1st Division being accepted after only a short delay (I rolled a 1 or a 2 on a single die). Tyler is instructed to cross Stone Bridge and join the attack to seize that damned hill! His brigades move out.
Fast forward to 15:00. Here is the situation on the Hill:
After their first assault is repelled, the arrival of Heintzelman's division - AND Tyler's division from the east - steadies the troops. Beside the Hill, Tyler's boys put increasing pressure on the Rebels, pushing them back and threatening to out-flank their Hill position. Jackson's arrival has shored up Rebel defences at the western end of the Hill, but without more troops, there is little the Confederates can do as the Union pushes further around the Hill.
At least in terms of this game, Jackson and his brigade are not going to have an opportunity to earn their famous 'Stonewall' sobriquet!
Eventually, the writing is on the (stone) wall and Confederate command decides to stage an emergency retreat (allowed when threatened by destruction or being surrounded), taking up positions south of the Hill. Further to the rear, Bee and Evans lick their wounds and recover stragglers.
While this is happening, fighting has broken out to the east - namely between Miles' division and a handful of CSA brigades under the command of Joseph E Johnston. After some delay, Miles had finally accepted my orders to advance down the Centerville Road so as to deter the Rebs from sending further forces to assist Beauregard. However, realising the poor quality of both commander and the bulk of his troops, I made it clear that should they face resistance from the enemy, then they were to adopt a defensive stance aimed at preventing the Confederates from moving northward.
At this time, Johnston's brigades have accepted his orders to attack northward, so the two forces are now clashing just north of Blackburn's Ford.
By 1830, this is how the battle has progressed:
By this time, the Union has consolidated its position on Henry House Hill. Most of the brigades are pretty beat up. Their original orders to take the Hill have been fulfilled, so they have gone on the defensive and set about recovering stragglers and distributing ammo. However, to keep the Rebs on the hop, I ordered Hunter's division to head west to Groveton, then swing south, along Lewis Lane and Compton's Lane, so as to threaten New Market from the west (black arrows, above).
Further east, the Confederates have succeeded in routing one of Miles' brigades and pushing his division northward, though at some cost to themselves.
With evening gathering, a zealous Hunter sends in Porter's relatively fresh (but small) brigade against Ewell's extended line, his boys charging to engage the grey ranks in close combat. Yet, the Rebs prevail, sending Porter's boys reeling back. Ewell's men follow up with musket and cannon fire, wiping out Porter's gallant brigade. Severely chastened, Hunter beats an emergency retreat.
The game draws to a close at 20:00. The Union is awarded VPs for holding Stone Bridge and Henry House Hill. After taking mutual casualties (points awarded for wrecked brigades) and occupying strategic objectives into account, the final result is a victory for the Union. Huzzah!
A great first game in our exploration of the Civil War Brigade series. On to Richmond!!! Ah, well...not quite yet....On to Second Bull Run!!


